INTRODUCTION
Overview
Rage is themed after the Red Lanterns. You’ll see a few in content like Bleeze, Guy Gardner, and of course their leader Atrocitus. Rage uses the Combo system to perform their abilities. After the initial cast, youll use either a melee input or a range input to perform the combos.
Patch Notes Changes
Beginner Tank
Overview
Rage Tanking has a few mechanics, Scar Tissue, Enrage, Fervor and Rage Crash.
- Scar Tissue increases your Health by a percentage of your Dominance up to 100% the higher your Combo Meter goes up. In order to get to 100% of your Dominance, your Combo Meter must reach x50 Hits. Anything higher than x50 hits won’t increase your Health based off of your Dominance.
- Enrage consists of taking Damage from enemies and having it turn into healing using your Abilities Severe Punishment and Vindictive.
- Fervor is a 50% Defense buff that lasts for 15 seconds so it carries over with each use of Severe Punishment and Vindictive.
- Rage Crash is when all the Healed Damage is returned to you in one big hit. The Rage Crash can either be cancelled with abilities like Outrage or Eviscerating Chain or it can be reduced with abilities like Violence or Galling Eruption.
- Rage Crash Cancel Abilities are Eviscerating Chain, Revenge, Outrage, Dreadful Blast and Plasma Breath. These abilities will Cancel the Rage Crash so you will not take any Damage. The Cancelers are only in effect for about 4 seconds. If the Rage Crash happens during this time, it is canceled. Timing is everything.
- Rage Crash Reducer Abilities are Violence, Galling Eruption, Bloodlust, Lacerate, and Remorseless Recovery. These abilities will reduce the damage you take from the Rage Crash and these are only used in this way while in Tank Role. These will not reduce Rage Crashes in DPS Role. The Reducers are in effect during their duration so if you crash while they are active, the Crash will be reduced.
Aggro
Aggro is not determined by any stat. While in the Tank Role, performing any ability on your tray will aggro enemies. Its important to use an ability every 8 seconds or else the hate level starts to drop. This was an old tool used in the game and there hasn’t been any word if its still this way but it’s best to go with it until otherwise.
The Dominance requirement for instances is there so to overcome the Willpower of enemies. The Willpower is never known but the more Dominance you have over an enemy the more likely your Crowd Control effects such as Knockdowns and Knock Ups will actually work.
Dominance does not effect Aggro.
Overview
Patch Notes Changes
Beginner Tank
Overview
Aggro
Loadout/Rotation
Stat Priority
Augments
Generator Mods
Artifacts
Beginner DPS
Basics of Power Interactions
Loadout/Rotation
Stat Priority
Augments
Generator Mods
Artifacts
Loadout/Rotation

Loadout
Eviscerating Chain
Severe Punishment
Galling Eruption
Ragebringer
Ire
Redirected Rage
1. Eviscerating Chain - E. Chain is a Single Target Pull and its also Rage’s 35% Finisher which means targets below 35% Health will take extra damage. This doesn’t matter the role you are in. Most importantly this is your Rage Crash Canceller. Performing the Rage Combo, Eviscerate, will also deal more damage to those enemies below 35% Health but it will also extend the length of time your Canceller is active to stop your Rage Crash. The combo gives you about 1 extra second for the Canceller to be active.
2. Severe Punishment - This ability is a must as a Rage Tank. Severe Punishment’s Enrage takes 85% of the incoming damage and turns it into Healing. The Enrage buff lasts 8 seconds. After 8 Seconds, you will Rage Crash and all the Healing that was done during that time will damage you in one attack unless it is Cancelled or Reduced.
3. Galling Eruption - An AOE field is placed around you causing Damage Over Time (DoT) to enemies who are in the field. The effect lasts for 12 seconds and it’s Cooldown is 12 seconds too. Enemies that are in the field get the Plasma Burn Power Interaction so certain abilities will do extra damage if the enemies have that Power Interaction. While you stand in this field, your Rage Crash will be reduced.
4. Ragebringer - A frontal cone AOE Pull ability. This ability is able to heal you for a portion of the damage you deal with it. In Tank Role the damage is reduced but the Healing is increased. With it having a very short Cooldown, you could spam this but be careful not to drain your Power Bar.
5. Ire - Your Breakout out ability that while in Tank Role gives the entire group/raid, including yourself, immunity from control effects for 3 seconds. Using this ability also heals yourself a little bit. You’ll want to use this ability before you perform your Rage Canceler Ability to ensure you aren’t knocked down or crowd controlled by the enemy so you can cancel your Rage Crash before you take damage from it.
6. Redirected Rage - This is your Power’s Shield ability. The Shield lasts for 12 seconds unless it is broken beforehand. You can use this Shield while you are crowd controlled and it reflects the first 3 attacks back at the attacker once its used. While in Tank Role, you also gain the Fervor Buff to increase your Defense. This shield, and other shields, will absorb the damage from a Rage Crash too.
Rotation
In your rotation you’ll want to use your Weapon to perform lunges and block breakers. I suggest a Melee Weapon like One Handed or Dual Wield as they have fast Lunges but the Player can choose how they want to play that. You’ll want to attack using short weapon combos so you aren’t countered by the enemy but regarding your abilities follow this rotation:
Start of Fight
Severe Punishment - Allow self healing to begin
Galling Eruption - Rage Crash reducer and AOE DoT active
Ragebringer - Pull in enemies and get healing from the damage
Weapon combos - Attack to get your Combo Meter up to increase your Health with the Scar Tissue Buff
Severe Punishment’s Enrage should be getting close to ending
Ire - Protect yourself from Crowd Control Effects
Eviscerating Chain - Cancel your Rage Crash
Redirected Rage - Use when Enrage Buff is over for protection
Severe Punishment - Once the Shield is broken, this ability should be off of Cooldown so activate again
Repeat Rotation
Adding Weapon Attacks in areas to keep your combo meter up will take time and practice. This isn’t the perfect rotation of attacking but it will provide you protection and a foundation of how to use your abilities and when. Severe Punishment should always be used off of Cooldown.
Stat Priority
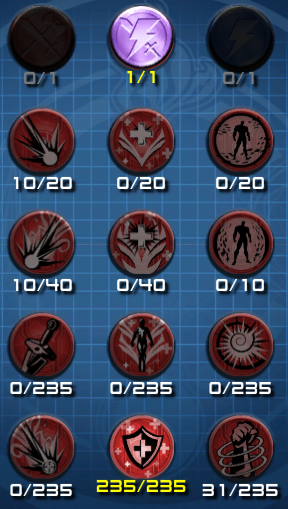
When it comes to the Stats Menu for Tanks, its best to go Hybrid Focus. fro mthe Mech
we don’t really use the Crits provided except Hit and Damage. You do not need to max them out. Just spend 20 points in order to get to the Tier 3 Stats. Rage doesnt use the Healing or Power Crits.
If you want to split your Stat Points into more than one Stat then you’ll want to pout a minimum of 100 Points into one stat before moving to the next one. Reason for that is because of the % buff which occurs every 5 points spent on that Stat. 100 Points means a 10% increase to that stat.
Health
Dominance
Restoration
1. Health - This is the first Stat you’ll want to put points into because it will increase your Health Pool. The Higher the Health the more damage you can take.
2. Dominance - This stat increases the strength of your Shield. If you want to focus more on Strengthening your Shield then you can spend points on this stat first but you’ll want to have a second Shield from the Iconics tree to do so. Contrary to the Scar Tissue buff, speccing into Dominance doesn’t help much with having a High enough Health Pool. You still have to spend time increasing your Combo Meter to x50 hits just to get to the 100% Dominance turned into Health. Because of this, Dominance should be the secondary Stat to spec into. You get enough Dominance from your Gear, Augments, etc.
3. Restoration - Our Self Heals do not rely on Restoration except Ire but that doesnt mean this is a stat to go right into at the beginning. Restoration is also part of the Shield Formula so having more Restoration will also increase the strength of your Shields.
Augments
Meta-Based Augment UI. Magic-based and tech-based players have different ui designs.
The Augments you’ll get from leveling will be the 4 Origin Augments. You’ll want to use the Dominating Augments as they will increase your Health and Dominance. You’ll get Adaptive Augments when you get into Episode 32: Teen Titans The Judas Contract and then you’ll get more from Episodes after that one. The Adaptive Augments are Episode Specific but you’ll still want the Dominating versions.
To level up Augments, you’ll need Exobytes from completing Missions in the Open World of those Episodes, On Duty Content, and from Salvaging Gear. If you have an Exobyte of the same name/color, you’ll get an extra 50% of Experience during the Fortify process. Basically, use Dominating Exobytes on Dominating Augments to get that extra Experience.
Generator Mods

General (White) - These mods are used with a Teleporter that you can purchase from the In Game Marketplace. The Urgent Warfronts Teleporter Mod will teleport you to most Episode Content that teleport to a different Open World Content.
Health & Power (Blue) - You’ll want the Health versions to increase your Health Pool. The Power Mods you don’t need to worry about because the Gear provides enough power for you to have an efficient Power Pool.
Support (Yellow) - Choose Dominance to increase your shield strength and your Scar Tissue buff.
Offense (Red) - I recommend Might just because the Generator Mods do not switch out when you switch Armories or Roles and in DPS you’ll be doing Might Damage but that’s later in the Guide.
Affinity (Elite) - These are bought in your HQ and the buffs from these Mods are unlocked by wearing a certain number of Elite Gear.
Artifacts
Artifacts were introduced to provide different “Playstyles” depending on how the player wants to play their role. Below are the suggested Tank Artifacts to mix and match. You can only carry 3 Artifacts at a time.
Bottled City Soder Cola
This doesn’t go into any of the 3 Artifacts Slots. Its in fact a permanent Soder Cola and goes into your Main Consumable Slot or into your Utility Belt. The benefit to having this item is of course a Soder Cola that will never go away on use. The other is that it gives a Group wide Buff to absorb a 3/5/8% of Damage based on the Tank’s Max Health for everyone depending on the Rank you have it.
You get this item from opening 15 Kryptonian Time Capsules or purchasing it from the Space and Time Vendor using Quarks BUT, you must have the Pour One Out Feat completed before purchasing from the Vendor.
Dilustel Refractor
One of the first Artifacts introduced in the game and still a good one for Tanks. Every time you use a Pull you give a Health buff yourself and the group/raid based on 11.5/15.5/17.25% of your Dominance. Now being in Tank Role, those numbers are buffed by 5/15/30% making the real totals 16.5/30.5/47.25% of your Dominance. Now the Pulls aren’t stackable but the buff lasts for 12 seconds. If you use a Pull during the 12 seconds the timer is reset.
You can purchase this item from John Constantine in the Watchtower and Hall of Doom. This item is also a choice as a reward when completing the Artifacts Intro Mission.
Legionnaire Sparring AI
Its one of the weaker Tank Artifacts or one of the best depending on how you play. As a Tank, if you are doing Weapon Damage this Artifact will increase your Precision and Weapon DPS to provide some extra damage to enemies. The reason this is considered for Tanking is because it also gives Crowd Control immunity for 3/4/5 seconds. To activate this Artifact’s buffs you have to successfully counter an enemy by Lunging, Block Breaking, or Blocking their attacks.
This item is sold by John Constantine in the Watchtower and Hall of Doom. This item is also given when completing the Intro Mission for the Attack of the Anti-Monitor Anniversary Event.
Manacles of Force
This item will activate once you are below 30% health. Once you are you are given the Unshakable Buff allowing for the next few hits you take to be absorbed by 50% for a few seconds. This artifact is a real life saver allowing you and your Healer to get health back while damage is being absorbed.
This item is sold by John Constantine in the Watchtower and Hall of Doom. You also get this Artifact for free if you complete the Atlantis Mission beating the Throne Raid.
Mystic Symbol of the Seven
This item gives a different buff at each Rank. Rank 80 gives you a Defense buff depending on the number of enemies within 5 yards around you. It maxes out at a 15% Defense Buff which means a having a max of 5 enemies around you to get the full benefit of the buff. At Rank 120 it gives you increased Incoming Heals by 10%. This is effective for Healers healing you but as Rage Tanks, it does not increase the Healing from any of your abilities. At Rank 160, you receive a small heal based on your Restoration for every hit you take by an enemy. This heal can only occur every .25 seconds.
This item you get by completing the Justice League Dark mission beating the JLD: Pub Crawl Duo.